This weekend, as the leaves are starting to change colour across Ontario, I have been thinking about gravestones (are you surprised?). More specifically, taking excellent photos for your historic survey of a burial ground. Of course, you can take photos any way you see fit, but this blog post is a guide to taking standard grave marker photos that optimise light, angle, and people that you have helping with the survey. Below, you will find examples of best practices for standardised gravestone photography, and some good examples of *not* to do.
I hope you can find some helpful tips in this post to take to your next project, or to share with a community that you are working with! All the photographs in this blog post were taken by me, unless otherwise noted.

How to take good gravestone photos:

The ideal gravestone or grave marker (not everything is stone, after all) photograph will include the entire face of the gravestone in one shot. This is best achieved by kneeling or crouching on the ground in order to line up your shot. Alternatively, you could use a tripod set quite low in order to achieve the same angle.
Getting a straight-on shot ensures minimal distortion in the photograph, which is especially important for not only reading the inscription, but to ensure that there is minimal distortion in your scale bar.
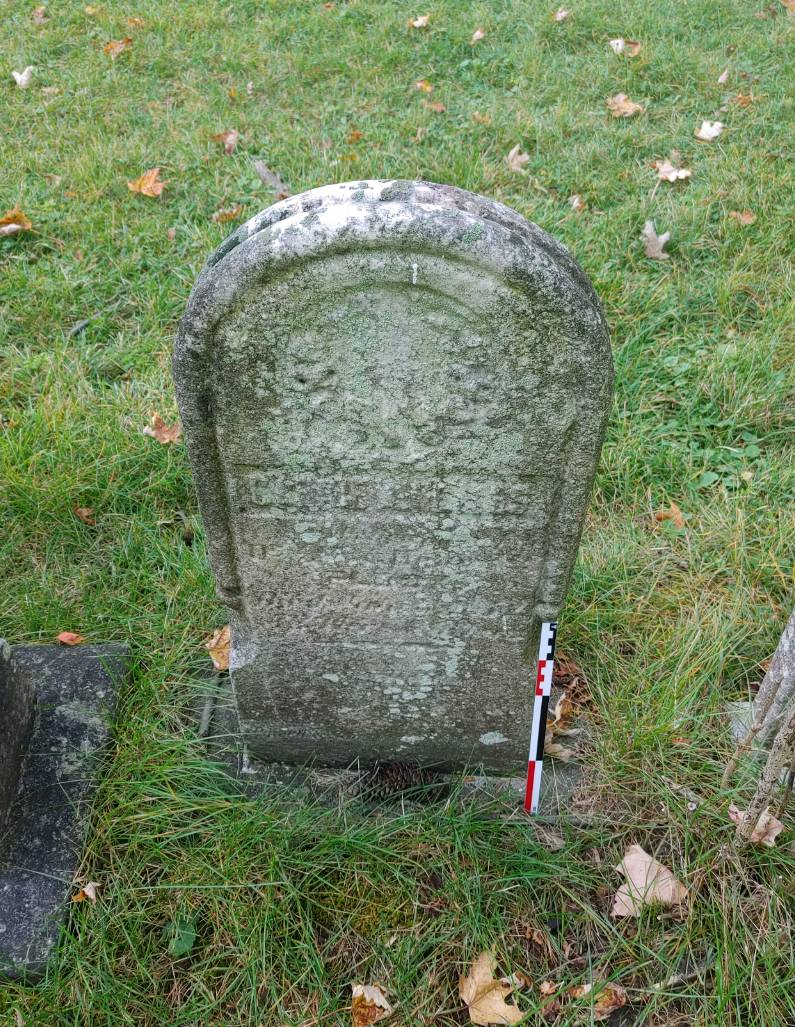
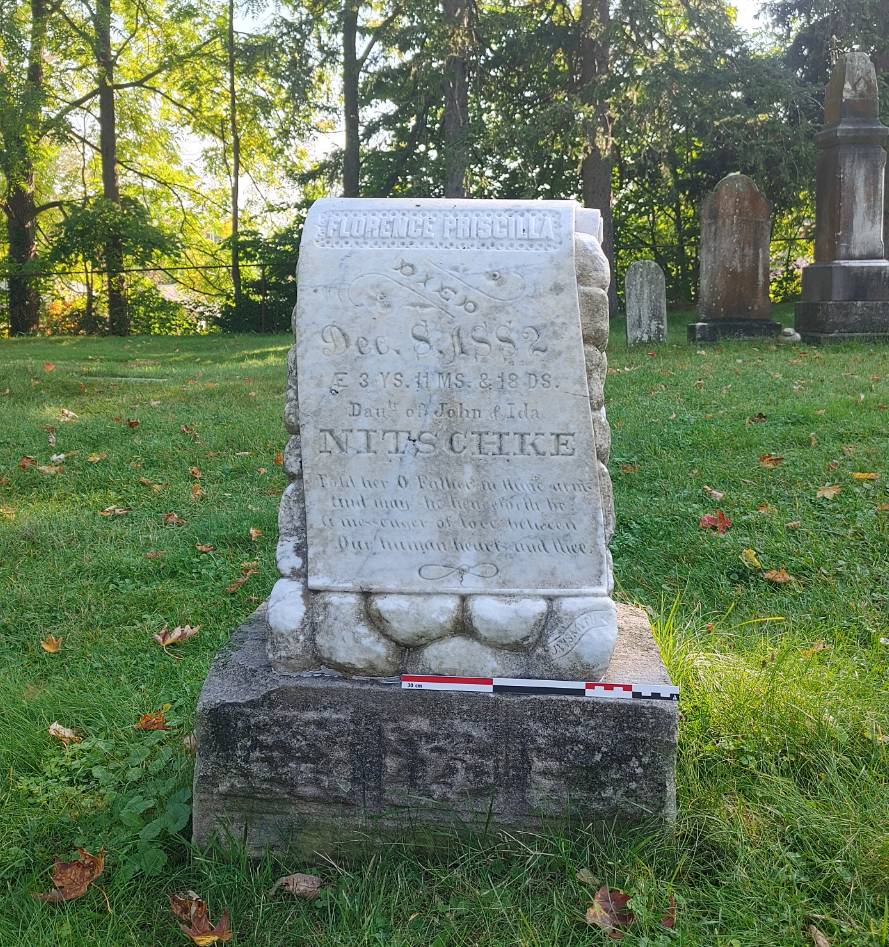
Using a scale bar in photographs of gravestones helps future researchers understand the dimensions of the marker. Even if you don’t have a large scale bar (I only have a little 30 cm one, as you can see if the photos today!), a ruler, a meter stick, coins, or anything that is a standard size and easily accessible to you can be included in the photo as a size reference that people will understand. Throw a tall Starbucks cup in there maybe, or a salt-beef bucket beside the stone! Something that is accessible to you, and a standardised-size will work! It is best to have the scale bar beside the gravestone, but I only have a small one so it had to go on the base.
Below, are two side-by-side photos of the same gravestone. You can tell that the left-hand image, taken from a higher angle while standing in front of the stone, is not a good representation of the size and style of the gravestone. Because of the angle, we do not have a good idea of the dimensions of the stone, even with the scale bar there, because the image is distorted! On the right is the same gravestone, photographed straight-on while kneeling on the ground. This photo, while still hard to read because the stone is fairly weathered, is a better representation of the gravestone. It is a good example of how to photograph a simple tablet headstone.

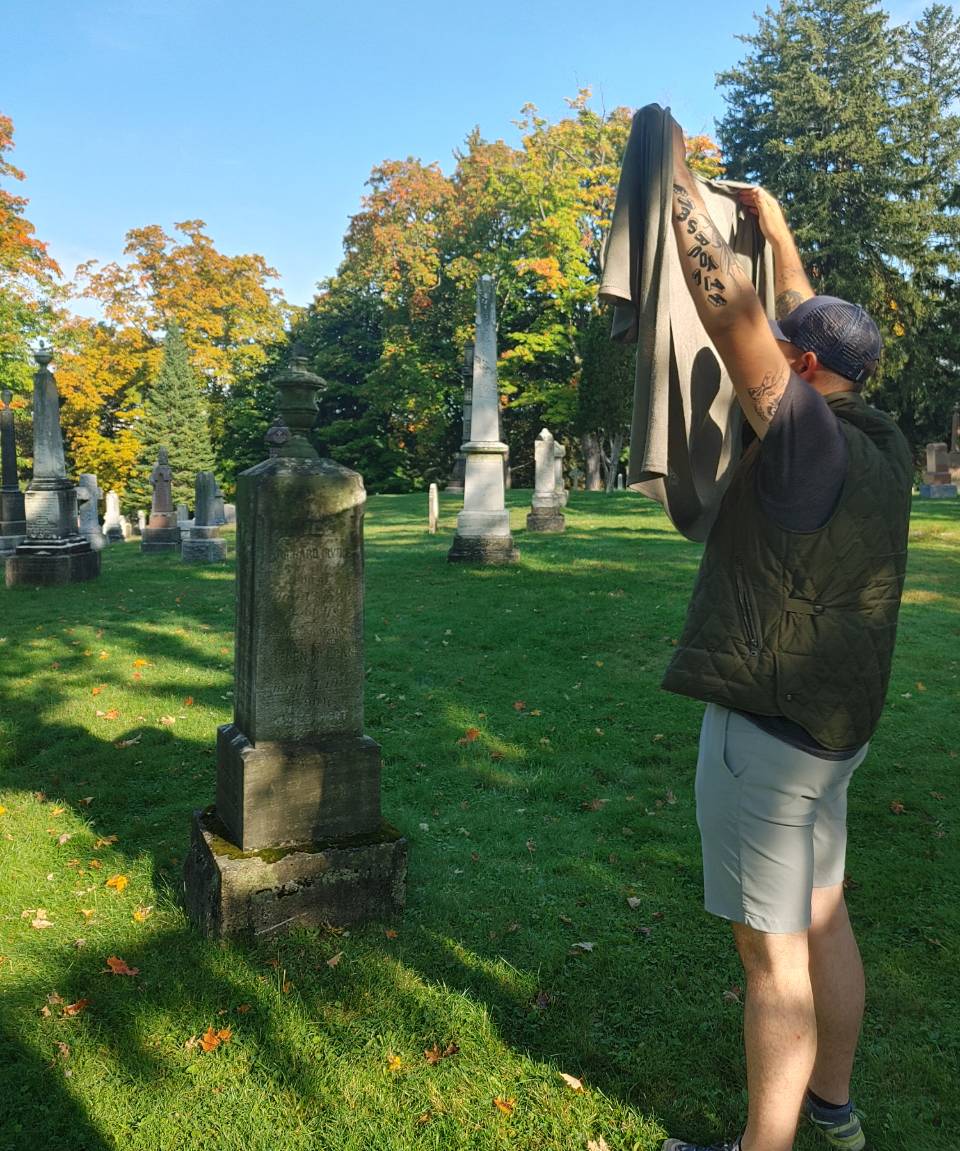
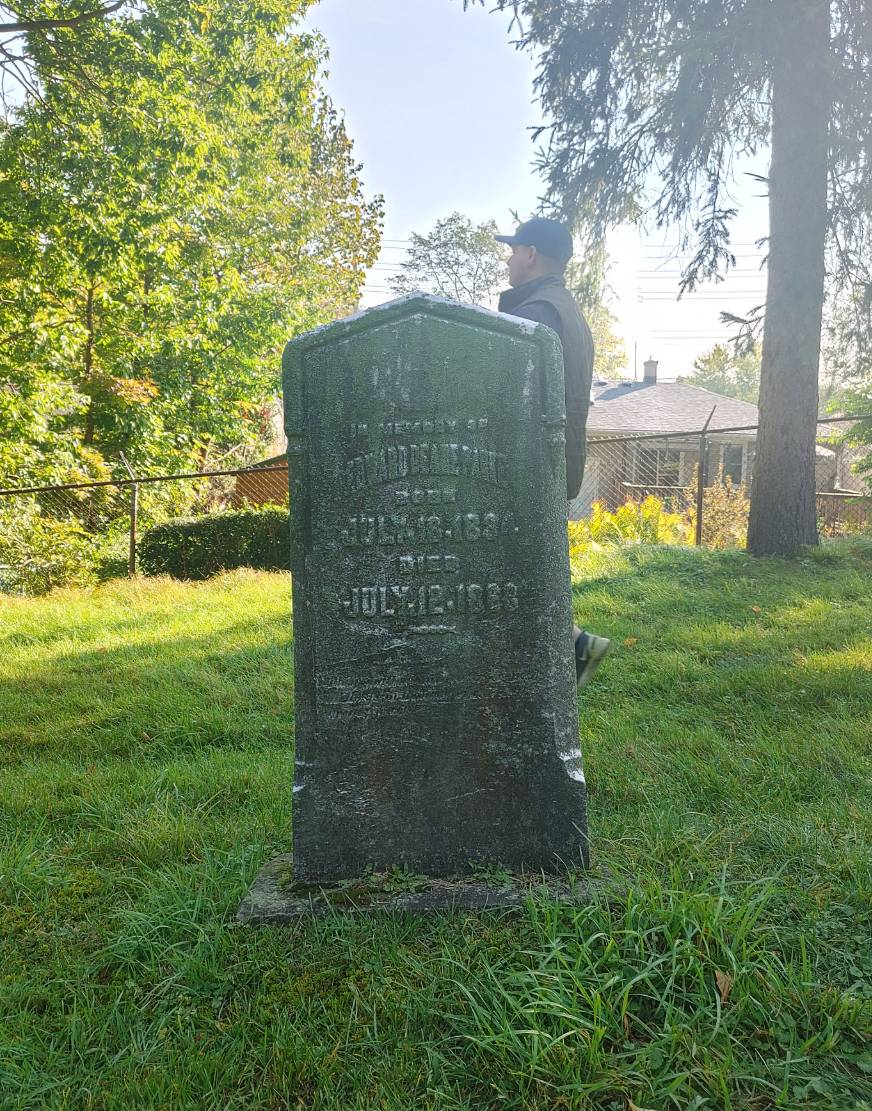
When photographing grave markers, you want to ensure that the light you are photographing in is as even as possible. Dappled light, or heavily backlit gravestones are very difficult to see details in, and make the photo hard to use in the future. It makes the inscription even more difficult to read, as you can see in the images below! Uneven or dabbled light can be caused by a number of things, but we mostly are affected by foliage causing shadows in the sun, or the shadows of people getting partially into the shot. When you have uneven lighting, the best option is to try and block out the sun all together.
The 1st best lighting for photographing gravestones is oblique, matte lighting. A bright, overcast day is ideal, but of course you can’t always have that in the field! Bring a large tarp or piece of fabric into the field to use as a cover to block out the sunlight when photographing stones, or use several individuals to make a soccer wall of shadow (or grab your spouse and hand them a sweater). This lighting may not be ideal for reading inscriptions on weathered stones, but is excellent for ensuring an evenly lit face.
The 2nd best lighting is bright, unobscured sunlight, at a raking angle. Think morning or later afternoon light that isn’t directly overhead yet. The raking light against the gravestone will help to bring out weathered inscriptions that are difficult to read without the visible shadows! However, make sure there are no shadows from people or plants on the stone on a sunny day! If you don’t have sun but want more direct light on your gravestone, there are a number of photography tools such as collapsable reflectors or external flashes that can help illuminate the stone from different angles. My personal favourite it to bring a powerful flashlight into the field and have someone shine it at an angle to help read and record (and/or photograph) the stone.


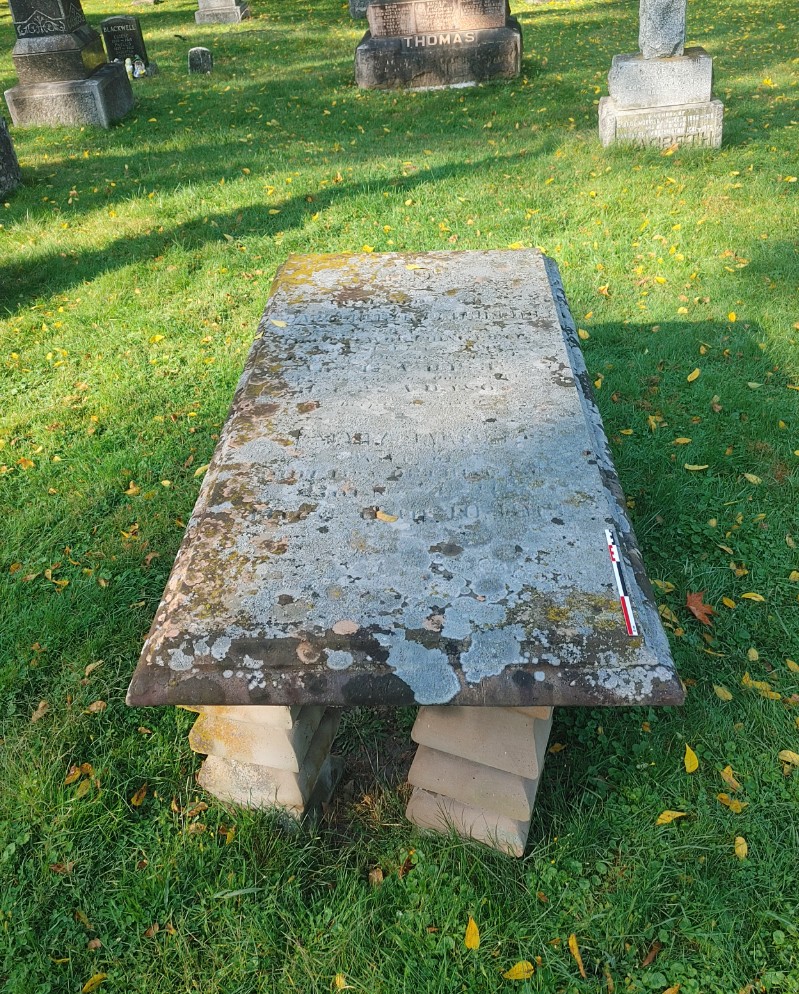
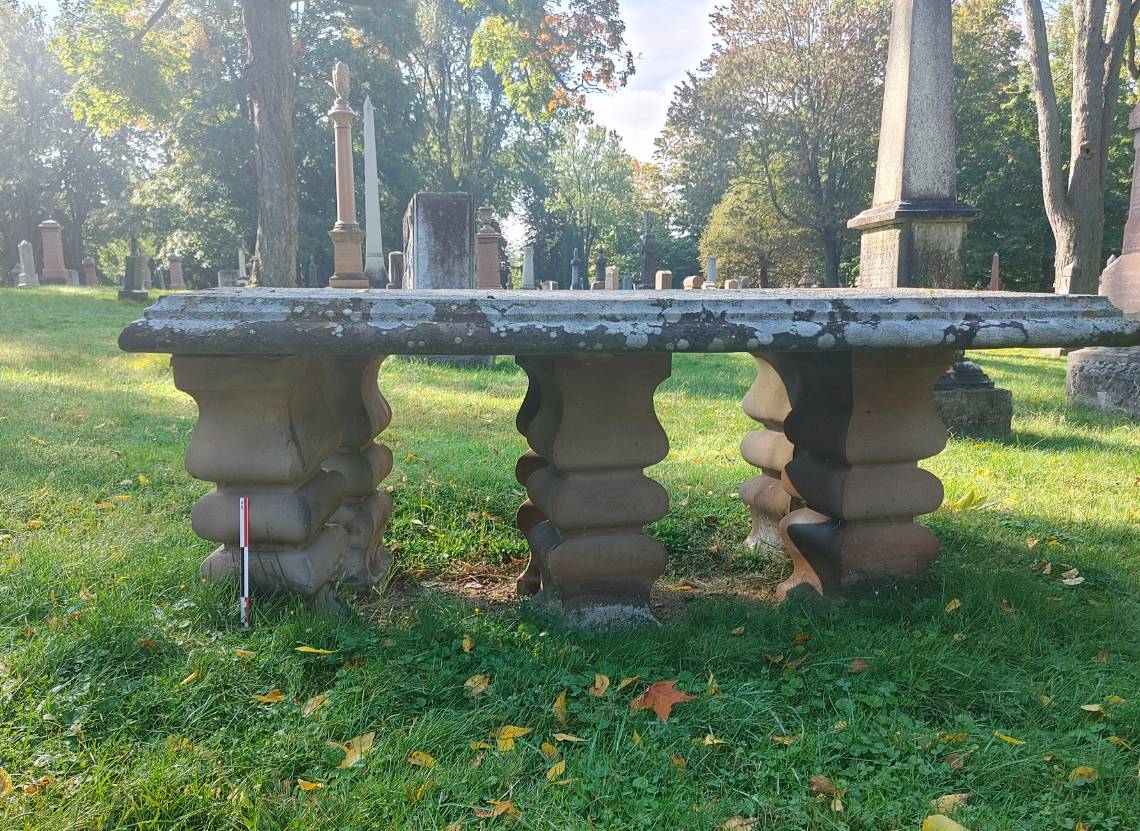
Another difficulty when photographing grave markers is when you have a marker that is larger than a simple tablet or taller complex marker…especially when they are something low and large like a chest or table tomb. When photographing a marker of this style, the ideal would be floating above it somehow, but since that is basically impossible to do without a lot of tools, you want to get the entire monument in ever overall shot. The first image on the left is a what-not-to-do example, where the photographer has included a scale bar, but has cut off part of the marker. This doesn’t give us a good look at the stone! The centre photo is idea for photographing a table tomb if you don’t have the help of a ladder. It’s a distorted angle, but is the best you can get from this angle. The right-hand image is a second photo of the same table tomb, taken from a straight-on angle on one side, in order to give the viewer and/or future researcher a better idea of the size, height, and style of the stone.

Two more examples of what you should avoid while taking photos of gravestones are below this section: having people in your photos, and not including the entire stone in the shot. On the left we have a large, complex granite monument with a ring cross on the top. By stepping slightly farther backwards from the stone, the entire marker could have been included in the shot. If you are worried about inscriptions not being visible in photos like this, simply take some close-ups of the inscriptions to include with your survey. It is impossible to know the full height, condition, or style of a gravestone if you cannot see all of it in a photograph!
The second photo is a two-fold example. It is backlit, making the inscription more difficult to see, especially on a dark, environmentally stained gravestone. The photo also has an individual in the background, which is not ideal for use in a report or in an online database, due to personal privacy and publishable images. When I supervised at a field school in Ireland where we were surveying burial grounds, I remember calling out for students to duck behind headstones and bushes in the background for a second so we could take a people-free shot of a stone!

In summary, best practices in gravestone photography include:
- Even lighting, preferably overcast or bright & at an oblique angle;
- No people in the background of shots;
- Straight-on angle to reduce distortion;
- No back-lighting if possible; and,
- Always include a scale bar or object for scale.
I hope this blog post has provided you with some helpful tips for surveying and photographing your local burial ground! There are many other types of grave markers that include other elements I have not included in this post, such as rails, curbing, steps, and footstones, but you can extrapolate these tips to work for you in your local cemetery surveys.
Many of the photos I have included in this post have brighter backgrounds due to the sunlight that is shining when I took the photos. Of course, we cannot pick and choose what kind of lighting we get when we go out to do a survey, but we can plan for the angle of light at certain times of the day, and bring tools like sheets or tarps to block out uneven light. The best way to conserve the history in your local cemeteries and historic burial grounds is to photograph and record them (but not rubbings) to be added to publicly accessible databases like billiongraves and find-a-grave!
There are a number of fancier techniques for manipulating the lighting in photos of gravestones, such as taking a number of photos and stitching them together for photogrammetry or Reflectance Transformation Imaging (RTI), which allow rendering of gravestones and manipulation of the lighting in the models. However, not everyone recording gravestones has access to these technologies (though they are cool, and I will talk about them later!).
As always, thank you for reading!

Pingback: This week’s crème de la crème — October 3, 2020 | Genealogy à la carte
October 10, 2020 at 8:24 pm
You don’t explain the purpose of a scale. By that I mean, how is the dimensions of the monument used? I’ve never seen one used nor dimensions mentioned.
LikeLike
October 12, 2020 at 8:01 am
The purpose of the scale is to provide that information in the records in case anyone needs it. It is the same as photographing the size of the artifact for a catalogue.,
LikeLiked by 1 person
October 12, 2020 at 8:06 am
Okay. That makes sense. Thank your for your reply.
LikeLiked by 1 person
November 17, 2020 at 4:01 am
I so enjoyed reading this. Thank you for posting.
LikeLiked by 2 people
Pingback: Burial Ground Conservation Tips | Spade & the Grave
Pingback: “Discussing Gravestone Conservation Digitally: Disseminating Data & Advice through Blogging & Social Media” #DigiDeath Online Conference | Spade & the Grave
September 4, 2021 at 4:01 am
This is a very much important blog
Thank you for updatingEdit Papa
LikeLike
February 8, 2022 at 1:19 am
The term you are seeking is ‘dappled light’ not dabbled.
LikeLike
February 8, 2022 at 9:08 am
Whoops, you’re right!
LikeLike