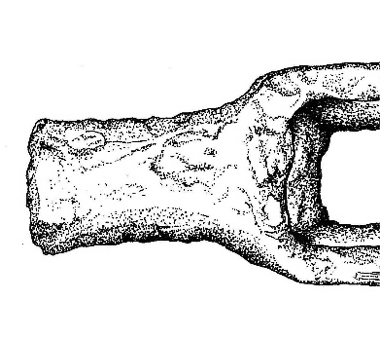
Portion of metal axe head (Lacy 2017)
This Friday, June 19th (Juneteenth), I taught an online workshop for the Newfoundland and Labrador Archaeology Society (NLAS). In case you missed the workshop or wanted a refresher after we wrapped up, I’ve turned the step-by-step drawing tips in a blog post. I presented the workshop from the occupied traditional territories of the Anishinaabek, Haudenosaunee, Lūnaapéewak, and Attawandaron peoples, under Treaty 6.
This post is a departure from my typical death and burial posts, The following post uses illustrations I drew specifically for the workshop, and I hope you find it helpful! In the field, I use my drawing skills in a number of ways, and it is always a skill worth investing time into. Please let me know if you have any questions.
I wanted to give a special thank you to the NLAS and to everyone who attended our workshop! We had over 80 participants, way more than we were expecting, and at the beginning we asked everyone where they were joining us from, and I just wanted to include our global workshop list here! We had participants from 5 continents, calling in from: Saudi Arabia, Liverpool UK, North Carolina US, Saint Paul Minnesota, Netherlands, Niagara Ont, Oman, California, St. John’s NL, New Hampshire US, Chicago, Kansas City MO, Egypt, Israel, North California, Niagara, North Dakota, India, Amsterdam, Virginia, Hamilton, Boston, CBS NL, Morocco North Africa, Aberdeen Scotland, North Holland, Scotland, Ireland, Michigan, New Hampshire US, Serbia, Cardiff Wales, Mass, Mexico, Philadelphia, North Ireland, Leiden & Northern Netherlands.
It was an overwhelming turn out, and we’re (me & the NLAS) so happy so many people showed up and had a good time! Thank you for all your hard work today!


Illustration Practice: step-by-step
Archaeological illustration is a very important aspect of depicting artifacts for interpretation on websites, books, and research papers. While photography and 3D rendering can do amazing things, sometimes the interpretation of an artist can better portray the details of an object that other methods of image creation. Beyond drawing artifacts, we also use archaeological illustrations in mapping, profile drawing (drawing the sides of units or trenches to show soil layers), and reconstruction drawings of sites. All of these drawings give us new ways to examine the data and interpret an archaeological site.
The Tools
- 0.5 – 0.3 mm mechanical pencils
- 0.2 – 0.05 mm black fine liner pens. Staedtler and Sakura Pigma Micron are excellent.
- Eraser – often soft, white erasers are more gentle on the paper.
- Grid paper – 1cm – 1mm grid paper
- Tracing paper – velum / permatrace / drafting film also works very well
- Ruler & Callipers, painting tape.
- An object to draw!
Lets Get Drawing!
Step 1: To start, I like to fasten my grid paper to my work surface with painters tape really inelegantly , to keep it from shifting around on me, with unsightly pieces of tape. The last thing you want is your paper moving on accident! Then, take your tracing paper or velum, and tape it down on the grid paper. It doesn’t have to look perfect, no one is going to see it but you (unless you’re me, and you’re photographing your work for a workshop…whoops).
Step 2: Place the object you are drawing on the paper. If you want to draw more than one side of the object, make sure you leave enough space on your page! As you can see in these examples, I am drawing on a small piece of velum & didn’t leave myself much space, but that’s ok because it’s an example! Today, I’m drawing a salt-glaze stoneware ceramic sherd that I collected while beach-combing on the River Thames in London, England last fall.


Step 3: It’s time to draw! Are you ready? Get out your pencil (I prefer a mechanical 0.5 or 0.3 pencil) and carefully outline your object. I like to stand above the object with one eye closed while tracing, but you can also rely entirely on callipers or another means of measuring. I usually double check my tracing afterwards. It should also be noted that tracing doesn’t work well with an oddly shaped or thick object, and you should always double-check the measurements.
Step 4: Now that you have the outline, it is time to start filling in some of the details! You can use your eyes, a ruler, the grid paper, or callipers to block in the interior shapes. Don’t worry too much about adding all of the detail or shading anything yet; what the purpose of this step is, is to block in the major areas that you will be shading with ink later.


Step 5: For objects that require more than one view, the best practice is to draw one side, the outline of the profile of the object as it is being turned, and the other side of the object. Lines are added between each to indicate that it is the same object from different views, and you don’t need to add any details to the profile in the middle. Add the detail to other side, and you’re nearly ready for inking!
Step 6: In technical illustration, the pencil drawing is typically not part of the final piece, as using an overlay allows you to ink crisp lines and not have to worry about smudging the ink while erasing. As well, if you mess up your inking layer, you can just do another one because the pencil drawing below is unchanged. In Step 6, lay another piece of tracing paper or velum down and secure it to your work surface. For inking, I’m a fan of the Sakura Micron outining pens, specifically with a 0.3 or 0.2 mm tip. I really like these pens because they have archival quality ink that is acid free and won’t fade or degrade over time. They also tend to dry a little quicker than the Staedtler pens, so you don’t have to be as worried about smudging the lines.


Step 7: Now it’s time to ink! This is the fun part, and also the most time consuming. Start by outlining the object’s exterior, along with any cracks or solid lines in the image that you need. Next, decide what sort of shading you’ll be using. Line shading is typically used to show shape and dimension on materials that are smooth, such as obsidian or polished wood, bone, or metal, while stippling, or small dots, are used to show texture and depth on rough surfaces, such a pottery, rusted metal, rough bone, or granular stones like quartzite. As you can see, I’m using primarily stippling to show the rough surface of stoneware.
Step 8: Finish your inking up, and you’re just completed a small finds drawing! Congratulations! My final step is always to add a scale bar, or else the viewer will not be able to understand the size of the object. I also sign and date the hard copies of my work, and remove my signature late on when they are being used for publication. If you want to digitise your illustration, scan it to your computer with a sheet of white paper behind the ink layer as a background, and then you can adjust the image from there!

Finished, digitised image of a salt-glaze stoneware sherd from London, England (Lacy 2020)
There you have it! Thank you for the overwhelming interest in the NLAS workshop this week, myself and the organisers were so excited by all of the buzz online and the emails we received about attending! My apologies to everyone who could not attend, but I hope you were able to gleen something useful from this blog post, and please don’t hesitate to ask me any outstanding questions you might have about the process.
And don’t feel discouraged if your drawings don’t turn out the way you want at the start. Even though this is technical scientific illustration, it is still an art, and takes practice. Keep drawing, my friends!
